Tuesday, December 17, 2013

1213 UFO Finished


I finished one old UFO (Unfinished Object in quilt-speak) this year, this month.  My goal for next year is to finish four.  I have 8 or so behind this one in various stages of completion, one ready to be batted and backed for quilting. 

Christmas Greetings, featuring a Nutcracker theme print fabric goes with my Nutcracker Christmas Tree (see fig. 1 and 2 below). 


    Christmas Greetings               44"x44"                  Figure 1


Connie's Nutcracker Tree          Figure 2


Monday, November 25, 2013

Quilt Festival Fun Classes 2013


I always try to take a class or two at Quilt Festival each year though I find I attend more lectures than I used to and sometimes classes take a backseat to that.  This year, I took two classes - one on using Photoshop Elements software and one on painting with Tsukineko inks.
 
David Taylor taught the Photoshop class.  He made it look so easy and fun.  Better yet, he made it seem like something actually doable by the novice photoshop experimenter.  Now, I'm actually thinking of downloading the software I bought three years ago and never took out of the box so I can play.  Well, at least it will be getting out of the box...

The other class was with Patt Blair, a wonderful teacher.  I thought I would do a portrait of my granddaughter, Elizabeth, when she was around three years old.  I mucked it up irretrievably at the eyes, drats! (See Figure 1, Original Photo, and Figure 2, my first ink attempt at portrait painting, below) but decided to finish it so I can further muck it up (making even more mistakes), before attempting the re-do.  Finished version and re-do version to be posted down the road when ready.


                                                  Figure 1


1-day Class with Patt Blair


Quilt Festival Fun 2013


Besides my annual thread purchases, including new SAQA thread, I bought two 12 x 12 pieces in the SAQA Booth, gave one away and an Alzheimer's Art Quilt Initiative piece which I also gave away.  I congratulate the staff of that wonderful organization who worked so diligently to reach their goal ($1 Million).  Of course, I also had to have 4 Pet Postcards (who could pick just one?) to support Friends for Life, a no-kill animal shelter and adoption center in Houston. 

The SAQA donation work I kept was made by Amira Wishinsky.   She called it Graffiti in Berlin (See Figure 1 below).  I loved the abstractness of it. It reminded me of a cartoon "speak" bubble and seemed Picasso-ish.  I rotated it right (See Figure 2).  It reminded me of a water drop and really spoke to me.  It now lives at the beach cabin.  Pet Postcards, Figures 3-6, shown below.


Graffiti in Berlin         Amira Wishinsky  12"x12"
                                                                       Fig. 1
 
 
Beach Perspective   Amira Wishinsky  12"x12"
                                                                  Fig. 2


Scratch Loves Soccer  4"x6  Wendy Butler Berns
                                                                      Fig. 3
 
 
Untitled       4"x6"       M.Bull
                                       Fig. 4


Best Friends                         4"x6"
              Maker Unknown   Fig. 5
 
 
  Jazz Cat       4"x6"     Grace Sim
                                             Fig. 6  


Thursday, November 21, 2013

Postcards - What to do with them


I love postcards, both receiving them and creating them myself.  But what does one do with them once a large pile has accumulated and continues to grow? Mine are generally displayed in a large clamshell at the beach cabin.  I have even framed and hung them on the wall in such a way as to "suggest" headboards above each of the beds (I had to get creative after checking out the cost of real headboards for the six beds in the cabin).  This was a fun project, and saved a bundle on real thing.  See Fig. 1 - 4 below.


  Bedroom 3                                                   Fig. 1
 
Bedroom 3                               Fig. 2
 
Bedroom 2                               Fig. 3
 
Bedroom 1                                                   Fig. 4


Thursday, September 19, 2013

Quilting Arts Article on Art Quilt Group - FiberVoices


The October/November Issue of Quilting Arts Magazine is due to hit the stands next week.
http://www.quiltingdaily.com/blogs/quiltingarts/default.aspx.

See the article written by Lynn Krawczyk on the art quilt group, FiberVoices, and its members, Mary Ann Littlejohn, Linda Teddlie Minton, Nancy B. Dickey, Susan Fletcher King and myself.  I am very proud to be a part of this group of very talented ladies.  That Lynn chose our group for her QAM article, Replenishing the Well, Fiber Art Groups is a thrill and an honor indeed.

I have not posted before about our group project, Speaking in Color, with Cheryl Johnson, guest artist, perhaps because it is featured on the FiberVoices website,  www.fibervoices.com  and blog, http://fibervoices.blogspot.com.

Below is a photo of the magazine cover and three of Speaking in Color hanging at The Art Alliance Center in Clear Lake, TX, where it received an exciting Juror's Award!


           October/November Issue, 2013


Speaking in Color-Dimensional View


                 Speaking in Color with Cheryl & Nancy 


                                                    Speaking in Color 


Friday, September 13, 2013

Using a Quilt Top as a Jumping Off Point to Other Creative Work


As my friends know, my work is NEVER done.  I am always "in school", playing and improvising, constructing and deconstructing, rearranging all to get from here to there.  I took an improvisational quilt top I created with the beach in mind (Figure 1) then went further and further until it had been broken down into three separate pieces of conceptual art work.

"Ike Bulls-eye" (Figure 2) was created on top of the original pieced top and became a statement about the hurricane and the kid's beach cabins, Time Bandit, which went down and out to sea during the storm in 2009 and Top Shelf, which went up in 2011.   I decided to cut out just the important parts relating to the history of the cabins then mounted each on its' own canvas (the canvasses will be mounted on white bead board to hang at Top Shelf, photo to be posted when completed).  See WIP photos "Ike" on the design wall and mounted on canvas (Figures 3 & 4).  I love the topsy-turvy view of the words as I imagine the turbulent loss of their old cabin and its rebirth in the form of the new cabin, both a direct result of the storm.

Next, I created "Whiplash" (Figure 5)  in three pieces which will be part of the SAQA Tx Exhibit called, A Texas Experience.  Finally, I assembled twenty-five 2-1/2" mismatched squares to create "Gulf Storm" (Figure 6), a back-up work for A Texas Experience. 


             Improvisational Quilt Top             Figure 1


        Ike Bullseye - Approx. 32" x 47"      Figure 2


                      Ike Work In Progress         Figure 3


             Ike WIP mounted on canvas      Figure 4


                          Whiplash - 12"x12"         Figure 5


                        Gulf Storm  - 12"x12"       Figure 6


Thursday, September 5, 2013

A Wedding Quilt for Cassie


I made a quilt top some years ago.  In fact, it was my "retreat" quilt which I worked on over several annual retreats. It was ultimately custom machine quilted by Diane Anderson of Quilter's Cabin.  It occupied space on a shelf as it was never used or given away.  When I learned of my niece's upcoming marriage, I dusted it off (fluff in dryer on no-heat setting) and spruced it up with the addition of more applique leaves, embroidery and a name tag (Figure 1).  Close-up (Figure 2)

The working drawing for the quilt was very rough, no fancy software (Figure 3).  Bride and Groom with quilt (Figure 4).  Time to start a new retreat quilt!


                  Cassie's Quilt    70" x 70"        (Fig. 1)


                        Cassie's Quilt Close Up     (Fig. 2)


              Work Drawing, Cassie's Quilt    (Fig. 3)


                           Newlyweds with Quilt   (Fig. 4)


Monday, August 5, 2013

Flower POWER


My Granddaughter, Elizabeth, loves peace signs and symbols from the flower-power era.  So, when she said she wanted a peace sign quilt, I found some cute kid fabric and went to work.  I created the peace sign blocks on paper and printed them off on fabric...ditto, for the large flower.  I decided to work them in with a stack of blocks created from striped fabric in two different color ways - one bright and one darker.  The bright ones really put the punch in "power".  I decided to create another quilt for the back so her work, a self portrait and two peace symbols, would be featured there.  Needless to say, I like her blocks better than mine and I now wished I would have put them on the front!  For some reason, I think of Cherry Blossoms when I look at the front.

Now to finish Abby's.  It's been waiting patiently for a border for several years and if I do not get busy, she will grow out of it!  Does this sound familiar?


                                           Flower POWER (Front)           58 1/2" x 58 1/2"


Flower POWER (Detail)


  Flower POWER (Back)


The Duo - Sissy and Bub


Monday, July 15, 2013

Making a Commercial Fabric Work for You


I have been painting on commercial fabric and making it my own for use in quilts and art quilts for some years.  When I recently found a great commercial decorator fabric (Fig. 1) to make pillows for my family room sofa, I knew I would be altering this fabric and adding to my painted fabric repertoire.  The fabric said 1950's to me but I wanted some bright yellow and a little black in it (to go with yellow leather chairs also in the family room).  I got out the paint and made it my own (Fig. 2).  And, the finished pillows look good on both the sofa and chairs (Fig. 3 & 4).


               Decorator Fabric  (Fig. 1)


                           Finished Pillow 18"x18"  (Fig. 2)


On Sofa in Family Room  (Fig. 3)


                                      On Yellow Chair  (Fig. 4)


Tuesday, July 9, 2013

To Cut or Not to Cut? That is Always the Question


Two of my fellow FiberVoices art quilt group sisters, Linda and Nancy, and I spent a week at the beach cabin.  We decided to paint, stamp, stencil, screen and otherwise mark fabric - colors on white, black on white and white on black.  When we were finished, we divided each work between us (Fig.1).  The question after we created the fabric was what to do with it.  In the end, however, cutting it and using it is the "name of the game".

I decided to make a fantasy pot of flowers wall-hanging for my 8 year old granddaughter, Elizabeth, using the black on white fabric as a background and other fabrics I painted that week for flowers.  The white on black fabric was used for the pot and some of the leaves.  The two commercial fabrics in the work are the brown/white circle flowers and the dark green fabric used for floral greenery.  All other greenery, flowers, etc., were painted designs on white fabric.  You can see from the Work-In-Progress photo (Fig. 2) that the background was too graphic, busy, and not very interesting.  I used a Gesso wash to dull it down and loved the contrasting results (Fig. 3).  The background seems settled, serene and inviting with the foreground bright, fanciful and full of life. 


                      Beach Retreat Work 2013     (Fig.1)


                                  Work in Progress      (Fig. 2)


       Flowers for Elizabeth 2013    16-3/4" x 25-3/4"  
                                                                    (Fig. 3)


Wednesday, June 5, 2013

Grammy and Abigail - Inspiring Each Other


My granddaughter, Abigail, came and stayed with me for a week when she was three.  Each morning, she would take me by the hand and say, "Come on, Grammy, it's time to go to your studio and do art"!  She had her own small table set up with paper, paint, water, pens, pencils, all the stuff necessary to have fun, and her favorite programs on the Tele (Abby work, Figure 1).  After she left, I painted some fabric (Figure 2) while the Abby impressions were fresh...and created Abby at Three (Figure 3).

...and, perhaps, some of my work has inspired hers (Figures 4,5)...


          Abby Painting 2007  (Fig. 1)


                          Assorted Painted Fabric  (Fig.2)


                           Abby at Three  20"x20" (Fig. 3)


             Grammy's Fish Fancy  12"x15"   (Fig. 4)


             Abby's Watercolor 2011   9"x12" (Fig. 5)


Monday, April 1, 2013

Quilting Arts Magazine Articles


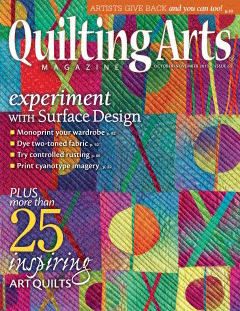
In 2008, I published my first article in Quilting Arts Magazine, Thread Trash - Using Old Threads for New Surfaces, which discussed the use of thread trash as a surface design element in work.  People have used thread trash in their work over the years but its use is not common (See Fig. 1).  I have used it over the years regularly in my work (See Staying Connected & other examples in my blog)...until...I began playing with painted coffee filters and paper towels.  My early compositions were cut bits applied with matte medium onto peltex with additional paint applied where needed, then quilted.  This led to a more painterly approach using torn bits.  I found I could manage light and dark values with the paper itself (using no paint "tweaks" in the final product).  
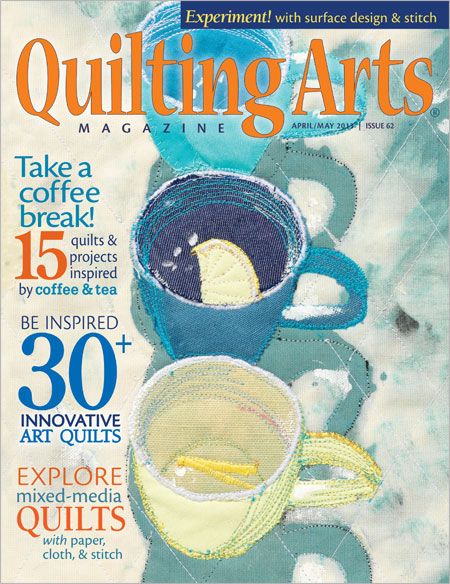
Painting with Torn Paper and Stitch - Create an Impressionistic Collage, is now a feature article in Quilting Arts Magazine, April/May 2013 (See Fig. 2).  The work featured (not shown here) was created using no paint tweaks at all.  Morning Ruminations, below, is my latest work, still in progress, using this process.

Figure 1:  Quilting Arts Cover, June/July 2008
Figure 2:  Quilting Arts Cover, April/May 2013
Figure 3:  Fall Forest (collage with paint tweaks and thread trash)
Figure 4:  Blue Vase (collage with no paint tweaks and thread trash)
Figure 5:  Morning Ruminations, a dyptich work-in-progress


                                        June/July 2008
                                                     Fig. 1


                                     April/May 2013
                                                    Fig. 2


 Fall Forest            (#1 of tryptich)
5"x7"                                   Fig. 1 


          Blue Vase         8.5"x14"
                                      Fig. 4


   Morning Ruminations - WIP               8.5"x16.5"
                                          and 12.5x16.6      Fig. 5


Monday, March 4, 2013

FiberSpeak Studio Now Open


I recently moved out of my old studio located in the master bedroom of our house to the living room/dining room to make way for an upcoming remodel of the back half of our house.  The back half of the house is original to the year it was built - 1954, and, yes, I have a pink bathroom and a green bathroom.  The new studio is the largest work space I have ever had.  I hope I can create some larger work to go with it.

View 1:  From Entry across Living Room to Dining Room
View 2:  From Living Room Window to Fireplace
View 3:  From Fireplace to Window
View 4:  Dining Room close up


                                                                    View 1


                                                                  View 2


                                                                  View 3


                                                                   View 4